Step 1
To add new blog posts or edit exsisting ones, you just need to follow these few simple steps.
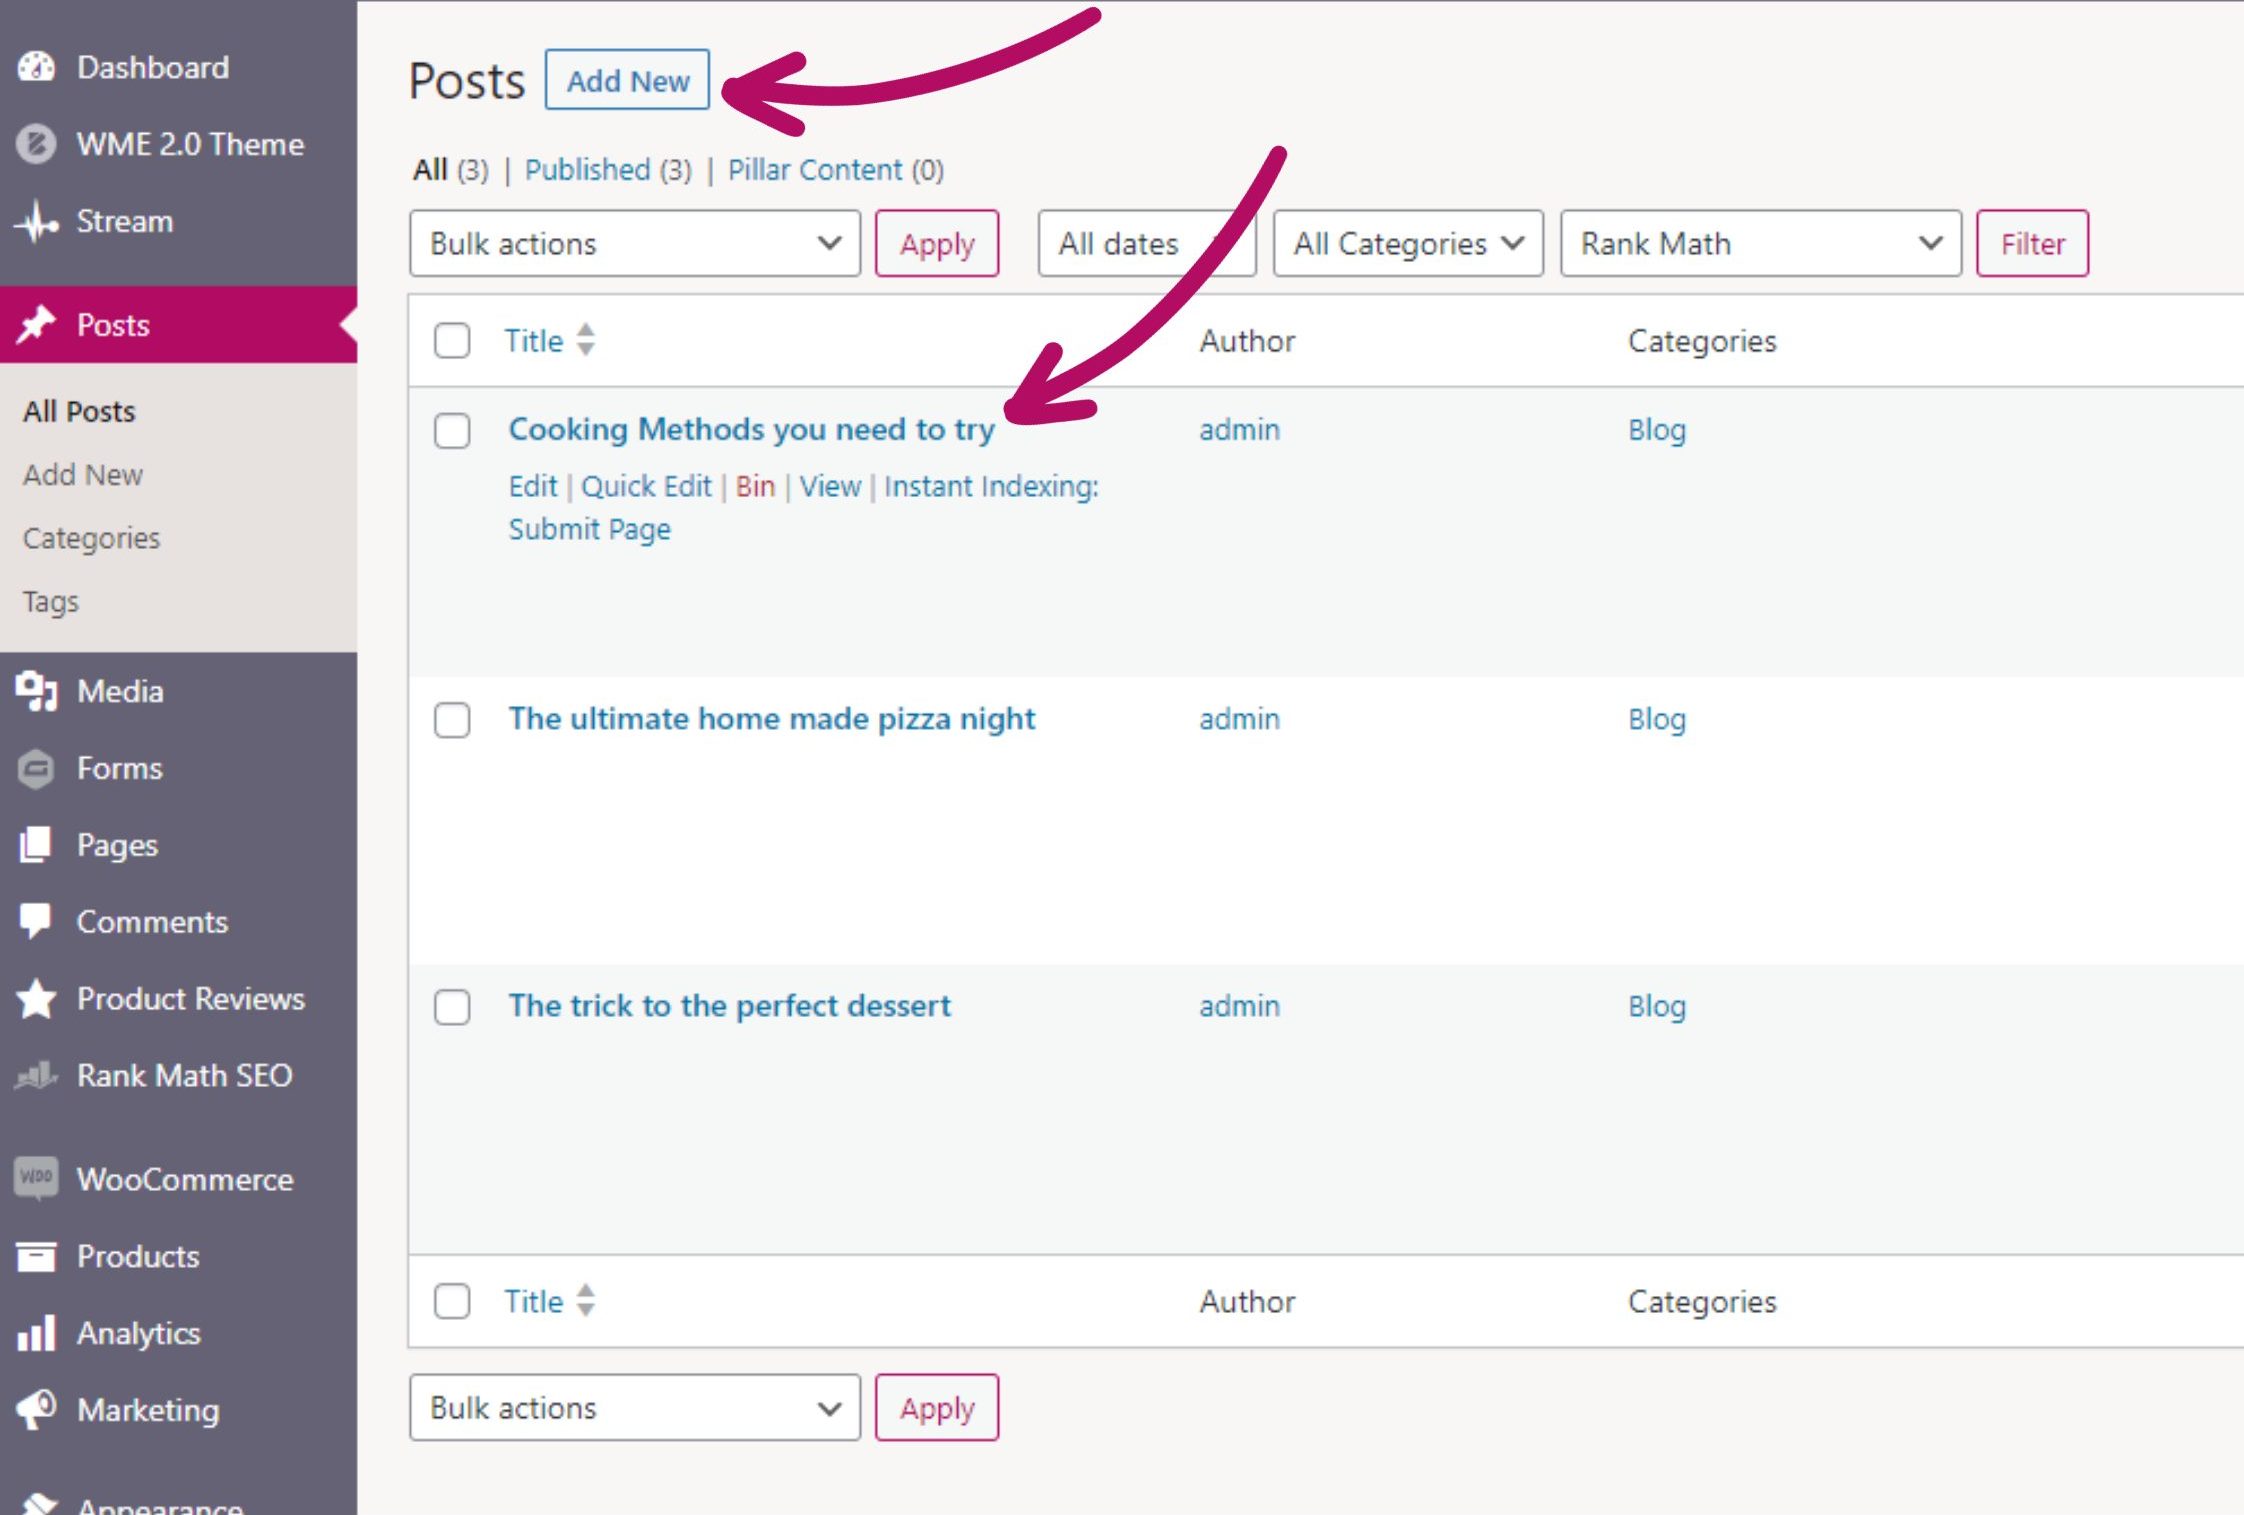
To begin, log in to the backend of your website, and head to “Posts“

Step 2
Once in your Posts section, you will have the option to add a brand new blog post by clicking the “Add New” button at the top of the page.
If you have exsisting posts, you will be able to edit them just by clicking them.
Step 3
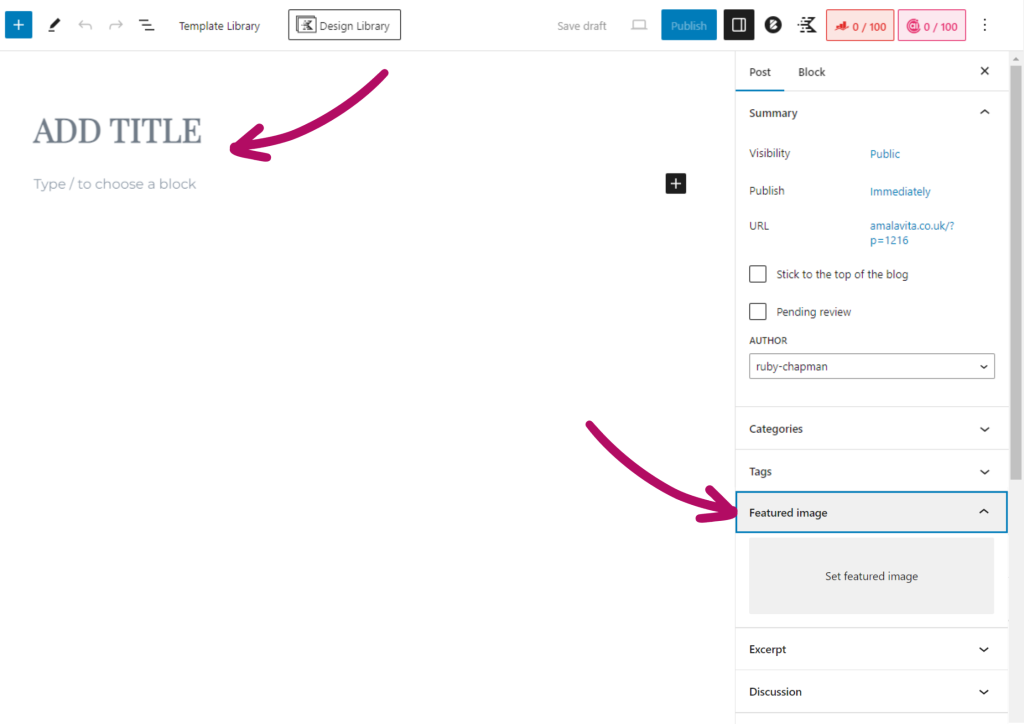
By clicking “Add New”, this will open a blank blog post for you to create.
To begin, give your blog post a title, and add a featured image too if you like. (this will be the cover photo for this post).

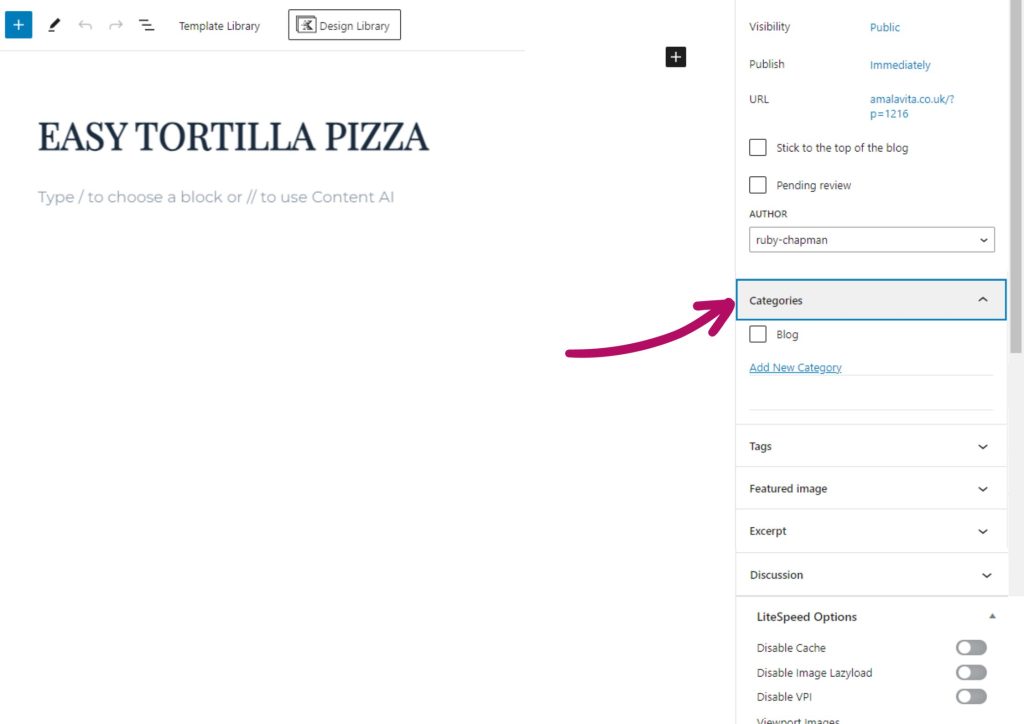
Step 4
In the right hand side panel, you will also see an option to add a category.
This is great if you have a large blog that you would like to split into various categories.

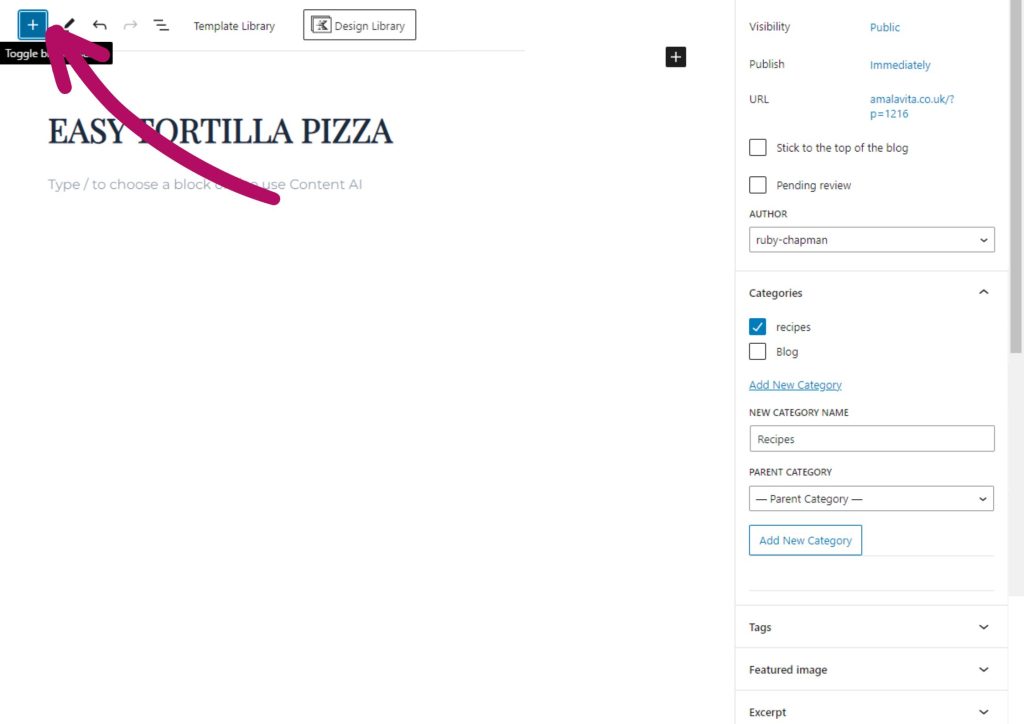
Step 5
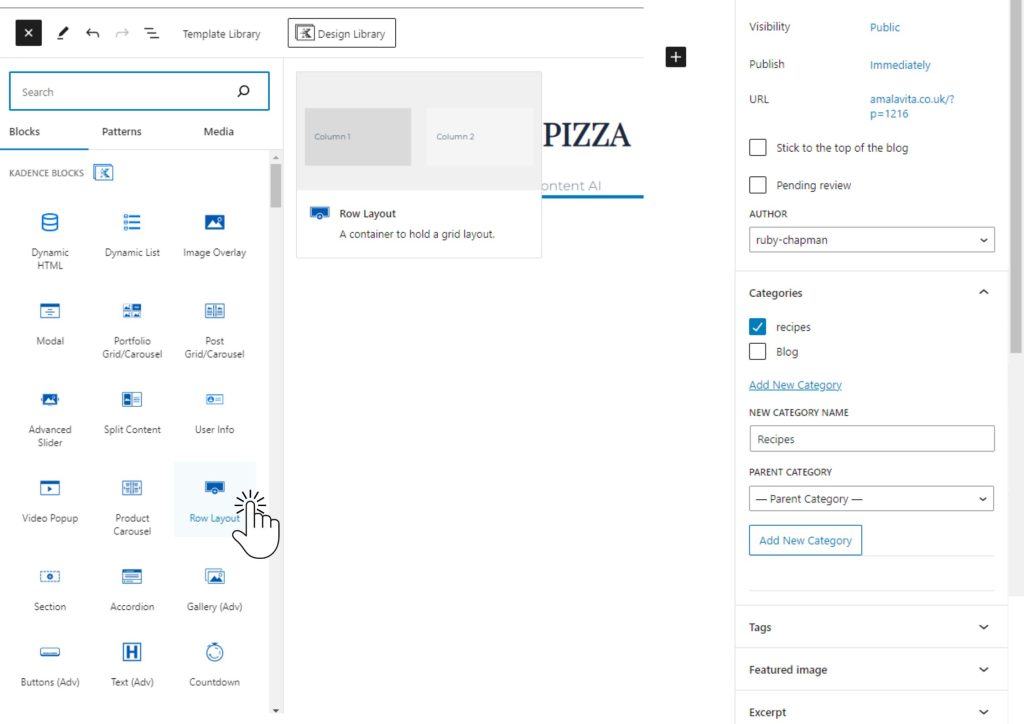
Now it’s time to add content to your blog post. To get started, click the “+” button located at the top left corner of the page. This will open up a list of available content blocks.
A great way to start, is with a “Row Layout” block.

Step 6
Now that you have the basis of your blog post, you just need to add your content. Try adding some text and maybe and image.
Don’t forget to hit “Publish” once you’re finished.