Step 1
From your website back end, head down to WooCommerce and hover over it.
Navigate down to settings and click it.

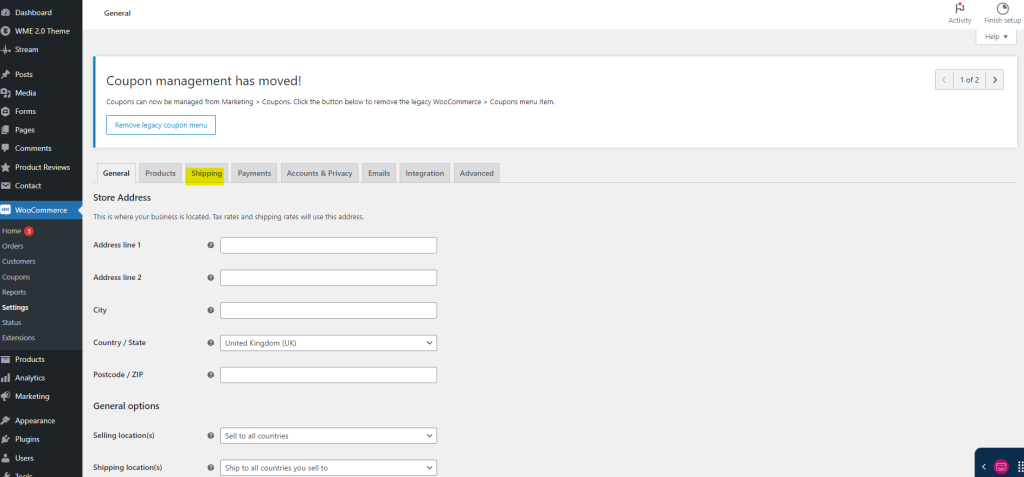
Step 2
You will be presented with different tabs for your WooCommerce management. Select the Shipping tab.
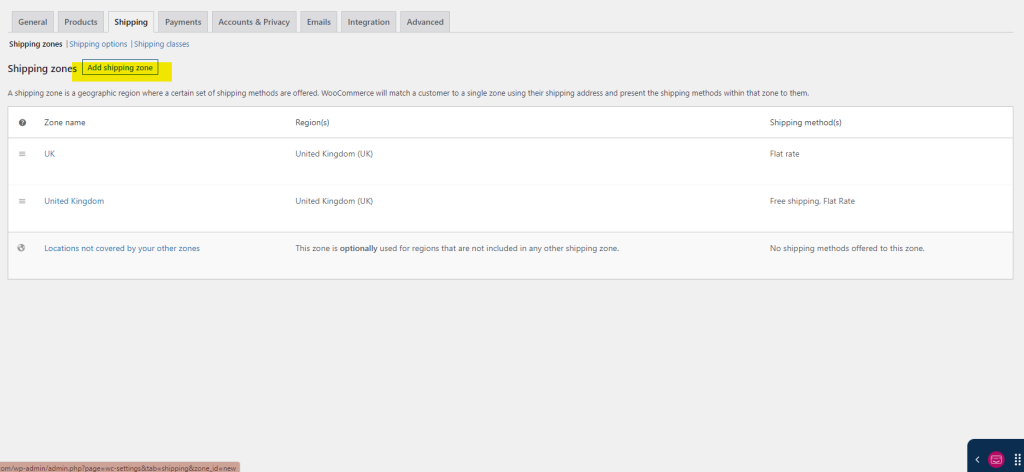
Step 3
Here you will need to add a shipping zone (unless one already exists).
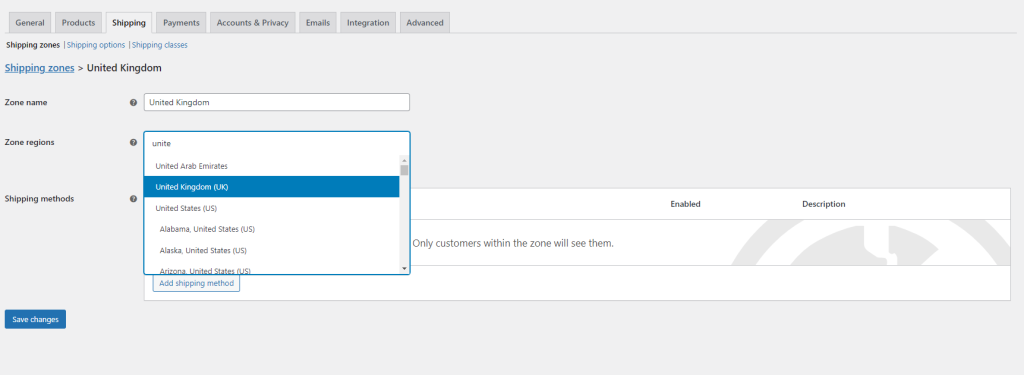
Step 4
Then you need to name your zone and select the country/area you will ship to. For example, United Kingdom can be the zone name and then the Region would also be United Kingdom.
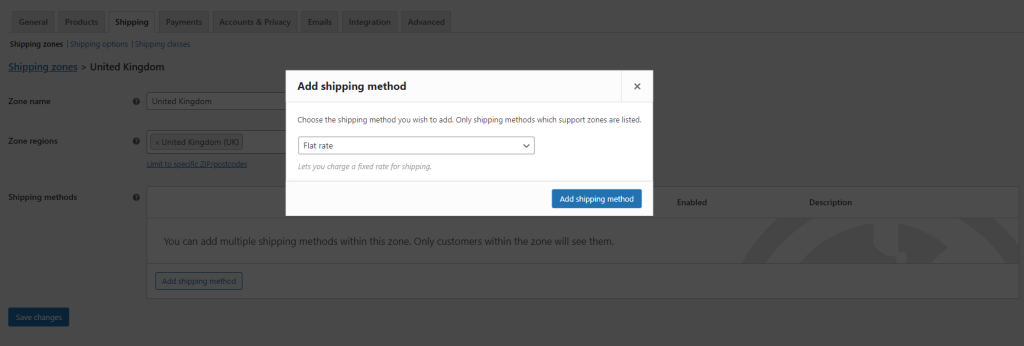
Step 5
You will then need to click “Add shipping method” and this box will appear. You can select Flat Rate, if it’s going to cost a specific amount for items to be shipped. There is also Free Shipping and Local Collection.
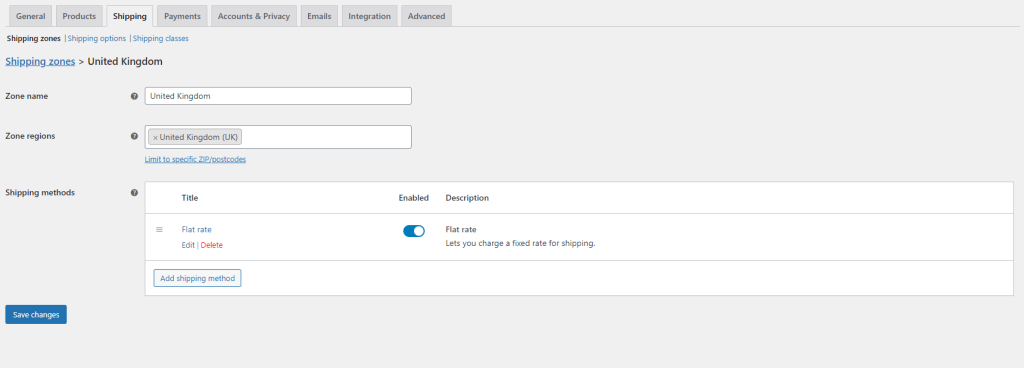
Step 6
Once flat rate has been added, hover over it to select the edit button.
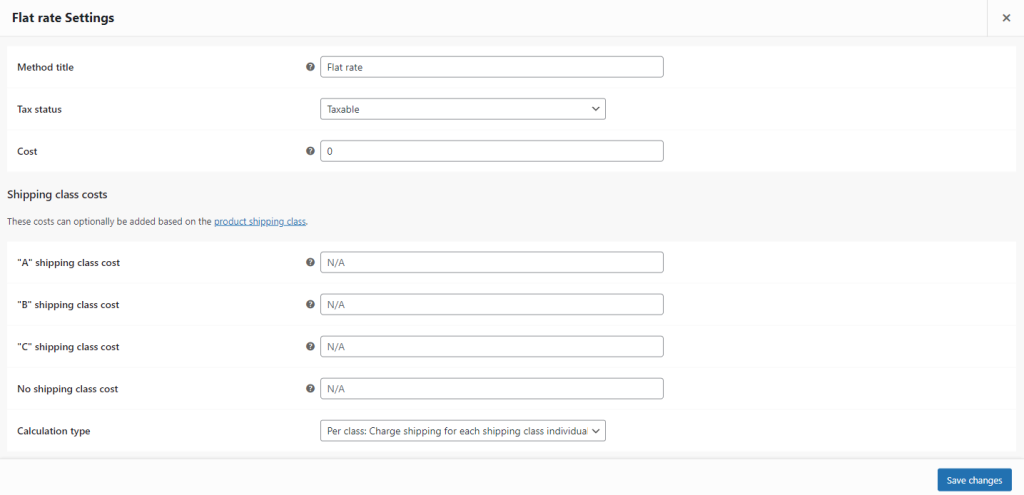
Step 7
Here you can change the Title, tax status and cost. Once you have amended these sections, simple click save changes.
Step 8
And you have successfully added a shipping method.